

Last night we played the second test game of Casa de Salinas, with Tom taking the French and Mike the British. With Mike being new to C&G we took time to share insights on how the game models the action, and as is always the way, after a few moves we were soon into the flow of the game.
 |
| The scenario set up with all forces on "blinds" for hidden deployment |
Play tests are really important when you are trying to model an historical action and rarely do you feel it is right the first time you play. I certainly felt that this was the case in the first run through we played last month.
 |
| Laplanne's brigade advance on the British position |
 |
| Laplanne's voltigeur battalion comb the woods ahead in open order |
 |
| skirmishers forward |
 |
| First contact! Mackenzies light battalion challenge Laplanne's voltigeurs |
 |
| The voltigeurs form line to force the issue with the light bobs |
The army moral levels were starting to separate quite noticeably as the first French brigade reached a cautionary status and Tom sensing the wheels were starting to come off his assault, threw caution to the wind and brought forward his final line of steady battalions to try and force the issue. With all hands to the pumps, even the horse guns were manhandled to within 75 paces of the 2/31st to fire off a round of canister.
 |
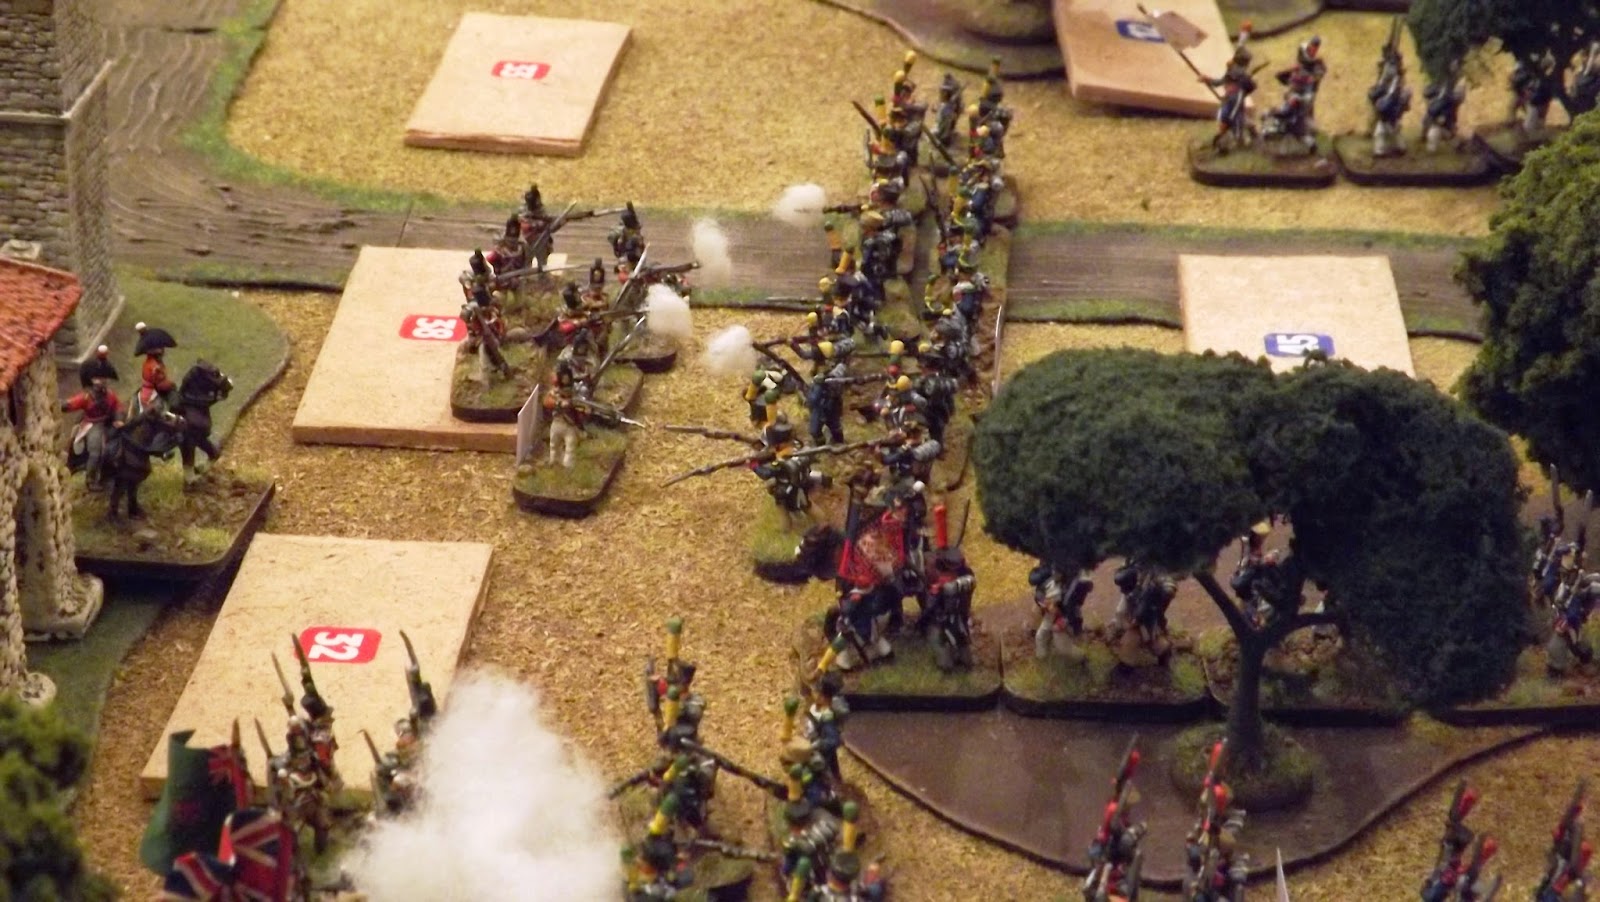
| Solignac's voltigeurs form line and "bump" the 2/24th |
With all French effort direct towards breaking Mackenzie's line around the Casa, Mike took the opportunity to break contact with Donkin's brigade, sending the 1/88th and 2/87th off in company column whilst covering their withdrawal with the brigade light battalion and the 60th Rifles forming a solid screen of open order light bobs.
 |
| Volley fire breaks out and the game is afoot |
 |
| As the 16e Legere move through the voltigeurs driving in the light bobs, they are met by the 2/31st |
 |
| The 1/45th bring their volleys into the fight as the 2/24th are forced back |
[ 501] Lieutenant General Sir Arthur Wellesley - Active A [1500 paces]
Brigade George Anson - Defend
[ 506] Brigadier General George Anson - Active B- [400 paces]
[ 509] 23rd Light Dragoons A 0/ 229 C [sk] Formed Good Fresh
[ 510] 23rd Light Dragoons B 0/ 224 C [sk] Formed Good Fresh
[ 511] 1st Light Dragoons KGL A 0/ 220 C+ [sk] Formed Good Fresh
[ 512] 1st Light Dragoons KGL B 0/ 228 C+ [sk] Formed Good Fresh
Division Alexander Randoll Mackenzie - Defend
[ 515] Major General Alexander Randoll Mackenzie - Active C [800 paces]
[ 533] 2/24th Foot 78/ 630 C [sk] Formed Good Tired
[R] [ 534] 2/31st Foot 102/ 558 C [sk] Disorder Average Tired
[ 535] 1/45th Foot 51/ 629 C+ [sk] Formed Average Exhausted
[ 536] Mackenzie's Bde. Light Bn. 35/ 193 C [sk] Disorder Average Fresh
Brigade Rufane Donkin - Defend
[ 516] Colonel Rufane Donkin - Active B- [350 paces]
[ 537] 2/87th Foot 0/ 539 C [sk] Formed Good Fresh
[ 538] 1/88th Foot 0/ 539 C+ [sk] Formed Good Fresh
[ 539] 5/60th Rifles 0/ 220 B- [sk] Formed Ex'lent Fresh
[ 540] Donkin's Bde. Light Bn. 0/ 175 C+ [sk] Formed Good Fresh
Strengths:
losses/active
266/ 3483 Bayonets
0/ 901 Sabres
266/ 4384 Total of all arms
10 Standards present
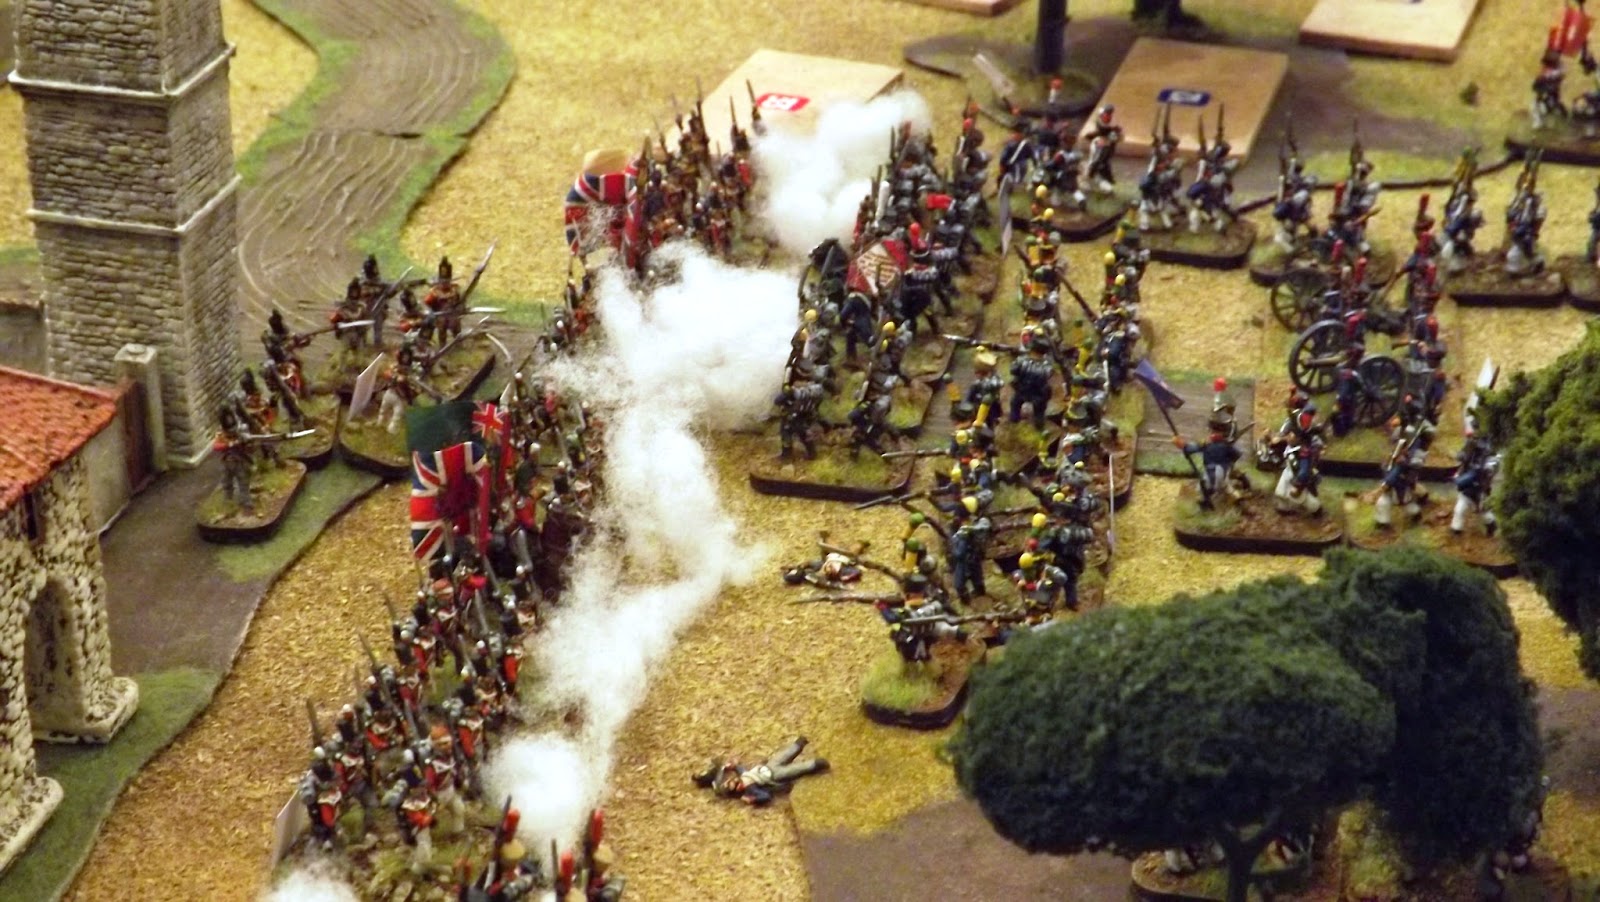 |
| The volley fire starts to tell |
[ 108] General de Division Pierre- Bellon Lapisse - Active C- [725 paces]
[ 102] 2/6me Artillerie a Cheval 24/ 132 [ 6] B- Formed Good Fresh
Brigade Jean Bartholomew R Laplanne - Attack [No Advance]
[ 109] General de Brigade Jean Bartholomew R Laplanne - Active C [350 paces]
[D] [ 111] 1/16me Regiment de Legere 246/ 343 C [sk] D'persed Broken Exhausted
[D] [ 112] 2/16me Regiment de Legere 238/ 360 C [sk] D'persed Broken Tiring
[ 113] 3/16me Regiment de Legere 11/ 459 C- [sk] Formed Good Fresh
[D] [ 114] 1/45me Regiment de Ligne 171/ 284 C [sk] D'persed Broken Tired
[ 115] 2/45me Regiment de Ligne 0/ 482 C [sk] Formed Good Fresh
[ 116] 3/45me Regiment de Ligne 0/ 459 C- [sk] Formed Average Tiring
[R] [ 117] Laplanne's Voltigeur Bn. 77/ 492 C [sk] Shaken Broken Acceptable
Brigade Jean Baptiste Solignac - Attack [No Advance]
[ 110] General de Brigade Jean Baptiste Solignac - Active C- [350 paces]
[D] [ 104] 1/8me Regiment de Ligne 140/ 356 C [sk] D'persed Broken Tired
[ 105] 2/8me Regiment de Ligne 17/ 454 C [sk] Formed Poor Tiring
[ 106] 3/8me Regiment de Ligne 0/ 460 C- [sk] Formed Average Tiring
[ 107] 1/54me Regiment de Ligne 0/ 474 C [sk] Formed Good Fresh
[ 108] 2/54me Regiment de Ligne 24/ 462 C [sk] Formed Good Fresh
[Y] [ 109] 3/54me Regiment de Ligne 189/ 300 C- [sk] Rout Broken Exhausted
[ 110] Solignac's Voltigeur Bn. 120/ 461 C [sk] Formed Average Fresh
Strengths:
losses/active
1233/ 5846 Bayonets
24/ 132 Artillerists
0/ 6 Cannon
1257/ 5978 Total of all arms
4 Standards present
 |
| High Tide - French units have broken to the rear, but Mackenzie's men are feeling the strain |
As of Game Turn: 10
The British Army has suffered losses of:
[ 5%] 266 men of all arms
including:
[ 5%] 266 dead and wounded
[ 7%] 266 bayonets
[ 0%] 0 sabres
Honours: [ 533] 2/24th Foot
The French Army has suffered losses of:
[ 40%] 2900 men of all arms
including:
[ 13%] 986 dead and wounded
[ 22%] 1643 missing
[ 3%] 271 prisoners
[ 40%] 2876 bayonets
[ 15%] 24 artillerists
Honours: [ 105] 2/8me Regiment de Ligne
The game was great fun and at the turning point quite tense, as Mike described it, as the British line seemed to waver slightly under the weight of the French attack. The fatigue caused to the French having to traverse the woods and the volley fire from the British on the first exchanges is still not right when looking at the original battle, and our third play through will look to remedy that before we move on to the Night Attack scenario.
Thanks to Mike, in his first game of C&G and a welcome return to Napoleonics, and Tom, a veteran C&G player, for a very entertaining evening.
Nice write up. How do you plan to adjust the fatigue for the French and lessen the British volley, or am I jumping the gun and need to wait for game 3? :) We use C&G as our principle rule set and will be doing our first run of your scenario soon so I am just curious.
ReplyDeleteThanks. Adam
Hi Adam, thank you. I am aiming to create a scenario that reflects the surprise that the French caused to the British rearguard, and give a high probability that the British will be contacted and broken or pushed back in the first contact.
DeleteWe had two battalions pushed back in this combat, but the French were unable to follow up and capitalize on their success. The casualties inflicted by the British fire was not right based on the accounts, so I need to tweak the random response. I think I need to wait to do game 3 before I comment further as I have ideas but I need to see if they work. Hoping to get the next game in this week.
Cheers
JJ
Another day for another great report, beautiful pictures (the last one is my favorite, stunning vue!) and armies...
ReplyDeleteHey Phil, glad you're enjoying the journey. You can't beat lines of troops close up, swapping volley fire for drama.
DeleteThanks for your comment
JJ