Tuesday 28 February 2017

Roman Empire at War - Don Taylor


As highlighted in my recent post on matters 'Augustus to Aurelian' and work on preparing the shift of focus to my Dacian Wars project later this year, I have picked up a copy of Roman Empire at War by Dr Don Taylor.

I should, I think, preface my review about this book by first stating that it is first and foremost a compendium, ie a collection of detailed but concise descriptions of the significant battles fought by the Roman Empire from Augustus to Justininan I, with a lot of minor ones thrown in to.

The point about this book is that the descriptions of these battles draw solely on the information provided by the earliest surviving chronicles or texts without any additional sub text to further illuminate the validity or not of those sources other than a very full description of the issues modern researchers will find when using them to work out the facts of these ancient battles.

With the occasional map illustration added to provide clarity to some of these battles. the reader is presented with the original references that underpin the modern descriptions that later authors have come up with and thus their efforts can be compared with the original source material and conclusions made on the educated guesswork that has gone in.

This makes for quite a dry read, but not an uninteresting one for the historical wargamer keen to underpin their scenarios with as much factual research that history will allow given the imperfect nature of this kind of source material.

I have found myself flicking through scenarios presented about many of the battles contained within this book and enjoyed analysing the creativity of others trying to make sense of the little that is known.

Thus this is not, for me, a cover to cover read but a book that I know I will come back to again and again as I look to build on my Early Imperial Roman and Dacian collection eventually adding in other barbarian foes together with sufficient Romans to allow for all the civil strife that plagued the empire and the many scenarios that collection will present and I will need to read up on.

So details about how this book is put together are that we have two parts to the layout:

Part One, pages 3-21 give a concise overview of the structure of Roman Imperial forces covering the early, mid and late empire. As a wargamer interested in ancient Imperial Rome I found myself skimming through this section as much of it was very familiar stuff. Likewise this is followed by a two page summary (pages 22-23) covering the role of Imperial naval forces over the same period.

Pages 24 to 36 are given over to looking at the reliability of ancient sources, notes about battlefield numbers followed by an alphabetical list of the various authors and their works together with a brief description of the background of these authors as a way of assessing the value of their contributions during further research by the reader. The encouragement that the reader should take this material very much as a start point for yet further investigation is quite clear and where some might find it frustrating that the author makes no comments of his own, I on the other hand quite like to be left to draw my own conclusions without additional bias, no matter how expert.

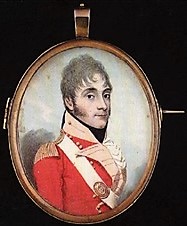
The Greek Philosopher and historian Strabo, one of the original
sources referenced in Roman Empire at War
Part Two forms the core of the book as the author lists the battles in an alphabetical order followed by a chronological order (pages 39 to 45) covering the period 31 BC to 565 AD and I love the fact that there is not a CE reference anywhere.

Each battle described is identified by name, date, the description of the action followed by the author or authors, their work/s and relevant page/or chapter identifier,

So for example a very succinct reference is:

Amasias River, 12 BC - In a naval action on the Amasias (Ems) River, the Roman general Nero Claudius Drusus defeated the Bructeri, a German tribe occupying the lands between the Amsias and Luppia (Lippe) rivers.
Strabo, Geography, 7.1.3

This reference caused me to flick through my copy of "Eager for Glory" by Lindsay Powell a book I reviewed back in January last year to see what Mr Powell had written about this action using his research and knowledge of Roman and German tactics and abilities in this period.


The cover of Lindsay Powell's book illustrates the kind of boat referenced in
"Roman Empire at War"
His chapter covering the campaigning season of 12 BC goes into detail describing the boats used by Drusus including pictures of modern replica's based on archaeological discoveries that have revealed the secrets of Roman design. His reference to this action was;

"The character of the Bructerian attack is not detailed (you can say that again!) but we may deduce that the Germanic opponent could take to the river in skiffs or canoes to try and board the Roman ships. They could also launch missiles and throw flaming torches from the safety of the river bank to set the Roman vessels alight: and cut down trees  and float them in the water to block the Romans' southward advance or their retreat downstream. The supply vessels were particularly vulnerable, being filled with flammable cargo and dry goods. The deck mounted artillery weapons on the Roman ships were pressed into action to pick off the Bructeri attackers. Superior arms and discipline prevailed and in Strabo's concise but grand phrase "Drusus won a naval victory over the Bructeri."  

Thus I think this simple illustration shows the value of Don Taylor's excellent work, as now we can all easily compare and contrast what modern authors, or indeed wargame scenario designers like me have come up with based on the original sources, combined with a mix of modern archaeological research that possibly gives us yet more insight into what might have happened.

The final sections of the book include a 'Notes' section that references the works used to illustrate the overview in Part One, followed by five pages of Bibliography that references the lists the modern and ancient sources referred to throughout the book and last but definitely by no means least there is fifteen page index listing People and Places refereed to in the book, very useful.

Dr Don Taylor holds a PhD in European History, concentrated on Ancient Mediterranean Studies from Fulbright College of the University of Arkansas (USA) and is Professor in European and Ancient History at Hardin-Simmons University, Texas.

The book is published by Pen & Sword Books Ltd and is available from them at £19.99 plus £4.00 post and packaging, however best price I could find was £12.76 with free delivery from Wordery online bookshop.

If you are interested in what underpins our understanding of the battles of the Roman Empire, particularly if you want to play wargame scenarios with that underpinning then I think reference books like this are a real must have. The fact that all the information has been brought together in one book is a real plus. For those interested in the earlier period of Roman history you can also find a similar book by Dr Taylor covering the Republic.

Thursday 23 February 2017

Talavera 208 - Bassecourts Spanish 5th Division, 2nd Battalion, 1st Real Marina


5th Division: Major-General Bassecourt - Source Oman (Battalions)
1st Real Marina (Royal Marines), 1st Battalion
1st Real Marina (Royal Marines), 2nd Battalion
Africa Infantry Regiment, 3rd Battalion
Murcia Infantry Regiment, 2nd Battalion
Murcia Infantry Regiment, 3rd Battalion
Reyna Infantry Regiment, 1st Battalion
Provincial de Siguenza (Militia)


The second battalion of the 1st Real Marina completes the second battalion in General Bassecourt's 5th Spanish Infantry Division and the regiment as a whole.


Details of the look of the Spanish Marines together with the colours they carried were covered in my first post about the first battalion (see the link above).

The six regiments of Marines were organised around two battalions, with the second battalion being issued with the Sencilla (Regimental Colour in British parlance) showing the Bourbon red cross with black anchors in each corner.


As with the first battalion I have attached my rendition of the Sencilla carried by second battalions and posted here for others to copy and scale appropriately. Once again a big thanks to Tony at Prometheus in Aspic blog for adding in the texturing effects.

Sencilla (Regimental Colour with texturing courtesy of MS Foy) at Prometheus in Aspic blog see link below 
If you would like to understand more about the colour choices I have used form my marines, you will find a short video clip on my post about the first battalion covering my preferences.


The role played by Bassecourt's troops during the afternoon attack by French Imperial troops was very much to pin the allied extreme left flank and saw them skirmishing with a strong screen of French light infantry among the lower slopes of the Sierra de Segurilla.

The effect of the Spanish troops severely threatened any serious attempt by Ruffin's and Villatte's infantry to turn the flank of the British occupying the Cerro de Medellin and allowed Wellesley to avoid denuding his centre of British infantry tasked with defeating the principle French attacks by Lapisse and Sebastiani.


The regiment as a whole will make a distinctive contrast in their naval blues to the standard white of the four Boubon line and one militia battalions that composed the rest of Bassecourt's division.


My 1st Real Marina are composed of figures from the AB range supplied by Fighting 15's.


Sources referred to in this post:
http://www.eborense.es/batalla_talavera1809_ejercito_espanol.html
http://prometheusinaspic.blogspot.co.uk
The Armies of Spain and Portugal 1808-14 - G.F.Nafziger & M Gilbert
Spanish Army of the Napoleonic Wars (1) 1793-1808 - Rene Chartrand & Bill Younghusband

Next up the third battalion, Africa Regiment.

Wednesday 22 February 2017

Kill Them All, Cathars and Carnage in the Albigensian Crusade by Sean McGlynn


Let’s get the title out of the way first, it is said that after taking their first large city, Beziers, the Papal Legate who was accompanying the crusaders was asked how would they decide who of the cities population was a heretic and who was a good Catholic. He is alleged to have replied:

“Kill them all! God will know his own!” and so they did, every one.

There are slight variations on this but whether true or not the Albigensian Crusade was infamous for the number of wholesale massacres that took place on both sides.

This book is described as a military account of the crusade (1209-1229) and it does a good job in that respect, the story however is quite different from what I expected to read mainly through incomplete knowledge on my part and it has greatly changed my opinion on this crusade.

Sean McGlynn’s point is that while the Orthodox Church needed the Cathar heresy to be suppressed, it quickly became a matter of conquest rather than conversion. This part of France was virtually, if not totally, independent from the rule of the French king, indeed great parts owed allegiance instead to Aragon and some even to the German Emperor. Most of the area was under the control of the Duke of Toulouse and the book revolves around his efforts in trying to fight off first of all Simon de Montfort and then the French King. Of course whenever the crusaders did take a town then any Cathar’s who were inside very quickly became nice and crispy but it becomes clear that militarily the Crusaders weren't taking out the main Cathar strongholds but instead were systematically going after the key cities and castles of the area.

The book can be split into four parts, first up is the anti-Cathar crusade that gets it all started.

(1209) 
The Pope finally despairs of the Southern nobles complete lack of effort in stamping out the growing heresy and proclaims a Crusade, as this is not the distant Holy land and is therefore a lot safer and cooler, there’s no shortage of volunteers to do a quick forty days work and therefore get all their sins absolved, they came mainly from northern France but also from Germany and even some from England. The Southern nobles mainly sit back, quickly surrender or offer half hearted support to the crusaders especially after what happens at Bezier. Carcassonne is captured reasonably easily and everyone goes home to start working on some new sins.


(1210-1219) 
The next part is the most interesting, after the main nobles go back home, Simon de Montfort takes charge and attempts to carve out his own little kingdom (not really a kingdom but you know what I mean; once in charge he would have then decided who to swear fealty to as long as they then left him alone). This is obviously now a blatant land grab and the Southern Leaders start to fight back, he is helped however by there still being a Crusade in place and so he does receive regular reinforcements each spring which allows him to go on the offensive, unfortunately they tend to drift off again after forty days so it’s a constant balancing act for him. This part ends when at the second siege of Toulouse, de Montfort says “see that heavy rock coming our way lads, bet you I can head it. “and there isn't a saving throw in the world that will help him.

Death of De Montfort at the second siege of Toulouse
This takes up the majority of the book and is very interesting.

(1220-1226)
With De Montfort dead his son takes over (no, not that one) and he struggles to hold back the Southern Nobles as they go back onto the offensive, still short of troops it’s a tough job and with various Popes now concentrating on the Fifth Crusade in Egypt he wasn't getting that many sinners helping him out.

(1226-1229)
Part three is where the French really pile in, lead by King Louis (the one that invaded England when the Nobles rebelled against John, Dover castle etc). He leads a massive Royal army, besieges Avignon but he also doesn't quite finish off the Southerners as he to becomes another casualty of this Crusade by dying on the way back home from dysentery. In fact it’s a pretty disastrous twenty years for anyone taking part as the death rate amongst the nobility is tremendously high compared to normal. We lose two kings, the second one being Peter of Aragon who is killed in the Battle of Murat against De Montfort and if you were a knight then it was 50/50 on whether you got ransomed or massacred when captured. (not such good odds for everyone else)

The French leader who remained in the area changes tactics to waging an economic war, what became known as chevauchée, and eventually the last Duke of Toulouse after giving it one final effort and now with no money or food, gives in and the area becomes part of France.


It’s a good read, the campaigns swing back and forth and there are even some decent sized battles and numerous sieges. De Montfort isn't the only one who gets on the wrong end of the defenders rock throwers, something quite rare I would have thought, crossbows or arrows certainly but I cannot think of many leaders who get killed by large lumps of stone, I mean, was he just distracted or were his followers just too frightened to interrupt him so that they could tell him to move five paces to the left.

The numerous sieges of Toulouse are also very interesting especially as they fight all of them off and also the fighting ability of the Northern knights allowed them to win despite the odds facing them on countless occasions, this difference between the North and the South of France is something I need to spend a bit more study on as it surprised me.

Carcassone today - Picture bt Jean-Pol GRANDMONT
If you want more Heretic burning then this isn't for you but as a twenty year campaign that continually swings back and forwards then it’s a very good read. Its also quite gruesome as they really didn't like each other.

Highly recommended

Hardback & Kindle
Readable pages 288 out of 320
RRP of £20, Best price 21st Feb 2017 = £14.27 Abe books

This has been a Mr Steve presentation.

Sunday 19 February 2017

Augustus to Aurelian Chits & Cards Update and other related stuff

All sets of chits sprayed matt white with the Barbarian blue set to do next
Last month I let you know about a set of chits available from Sally 4th for those of us who don't particularly love shuffling cards, but do love randomised activation

http://jjwargames.blogspot.co.uk/2017/01/augustus-to-aurelian-command-chits-from.html

So I thought I would share my experience preparing them for playing with.

As you can see Roman set red are done and after a bit of trial and error I found the best way to get these chits colour coded was to spray the face up side matt white and apply a black wash to the detail and then tidy them up with brush on acrylic white.

I then colour coded them using a red sharpie pen, job done!

My Roman set red all done and dusted

It takes a bit of time and I will give them a spray of matt varnish, just to give them a bit more protection to wear and tear, but I think they have come up ok.

As you can see the Barbarian blue set have just had the wash applied so they are next up.

Also, this week I had a chance to do what most wargamers love to do in their spare time when not painting and that's messing about with ideas you have worked on, left alone and reviewed.

I wasn't completely happy with my AtoA unit cards and I needed to add some for officers showing their stats so these are the latest versions which are much smaller so shouldn't dominate the table.


The nice thing about the officer cards is that I can put a spare number chit on the appropriate card to identify a particular commander for chit drawing.


AtoA has a neat system of limiting Roman legionaries to one round of pilum fire in any one game and it is important to record when that fire has been used up and I think I might have found a neat way of indicating that, as well as some disorder and shaken markers - more on those ideas later.

Carrying on with the Ancients theme I am now the proud possessor of Warbases Hurlingstone Villa together with a front wall and gate to complete the complex.


I featured this new range of 28mm Roman buildings after my visit to Warfare last November and I am really looking forward to putting this model together. 


With plans to do games with raiding Dacian and Sarmatian warbands along the Danube into Roman Moesia, this will make a really nice objective/backdrop piece of terrain.

In addition to my new Villa, I also picked up a copy of 'Roman Empire at War' by Don Taylor, to support some research into the historical record when putting scenarios together


Next up the 1/2 Spanish Marines are done and based with just the ground texturing to do before their photo-shoot.

Sunday 12 February 2017

Fireball Forward - Devon Wargames Group


Yesterday, Tom and I had much fun at the Devon Wargames Group playing a gamed hosted by fellow DWG member Si B, using his 1940 collection of WWII 15mm figures and playing for the first time, Fireball Forward (FF).

Battle for Stonne-15th &16th May 1940 - Devon Wargames Group

I saw the rules being played at Devizes last year and was reminded of them from when I first read about them with the publication of the first edition a few years ago.

I remember them looking like Squad Leader for the table-top very much with their modelling of section or squad bases rather than weapons groups as in I Aint Been Shot Mum (IABSM).

Si's collection of WWII 1940 15mm in action yesterday at the DWG
So what was my first impressions after our first game?
Well I like them and both Tom and I found ourselves very quickly picking up the nuances that the card driven activations present together with getting our head around the different dice combinations (D6, D4, D8 D12 and D20) we were using for the various weapons.

As with all variable initiative lead driven games each side is looking to string a series of moves together to allow a combined attack to have the greatest effect.

One key difference in FF is that the initiative cards (red suit/black suit playing cards) are drawn from the deck continuously, only stopping when an opposite colour suit is drawn. The player then decides based on the number of cards drawn which and in what sequence the corresponding units (Platoons) will activate marking each with a sequence number, 1st 2nd 3rd etc.

Each unit then conducts its movement, rallying and firing in any sequence it chooses before the next unit is activated and the process is repeated.

This means that every unit gets to activate in a turn before the cards are reshuffled unlike in IABSM where a double Tea Break card can end a turn leaving some units unactivated.

This aspect of IABSM can put some players off and I suppose FF provides more certainty of stringing moves together knowing all will activate at some stage in a move. I probably lean towards the IABSM level of uncertainty and chaos management simulation as being more in line with my own thinking but I found myself enjoying Fireball Forward, so the difference for me is minimal.

My one success going up against Tom's tanks yesterday
The other aspect of the rules that stood out for me was the use of variable dice for range and chances to hit, that once memorised produced a tense excitement to the combats.

For example, the light mortars and HMG fired using a combination of D20 for range, two red and two white d6 for hits.

So the basic chances to hit are set at 4+ for targets in the open, 5+ for in cover and 6 for hard cover/buildings and these are the factors applied to the white dice. The red dice reflect exceptional shooting and thus only cause a hit on a 6. If the D20 score is greater  that the range to the target then the shot is deemed to be in effective range adding one to the white die score.

Hits are then saved against using a D6 to roll equal to or higher than the base morale of the group/s targeted with groups usually requiring 4+ to save or 3+ if close to an un-hit commander who would test to save first.

Two hits on a group would destroy it, with commanders able to test to rally off successful hits when newly activated. Thus multiple hits were the order of the day in an attempt to destroy or drive enemy groups back suffering single hits and choosing to fall back before attempting to rally them off, or not if staying in hard cover.

The variable range dice are a very clever mechanic and provided a large level of uncertainty as to how effective any given fire attack would be. Certainly towards the end of the game, with units cowering in buildings carrying single hits and the threat of getting a second with multiple incoming rounds really created a sense of tension which was great fun.

Fireball Forward are a very good set of rules and provide an entertaining game, definitely worth checking out.

Wednesday 8 February 2017

Talavera 208 - Bassecourts Spanish 5th Division, 1st Battalion, 1st Real Marina


The  completion of the 1/1 Real Marina begins the end of the Talavera project as work starts on the final division to complete the orders of battle required to play the afternoon attack. Once these seven battalions are done it just leaves a team of Spanish horse guns and some personality figures to finish the project prior to playing the games.

The Spanish 5th Infantry Division was commanded by Major General Luis Alejandro Bassecourt, and was very much General Cuesta's reserve division with its four battalions of regular infantry and two battalions of marines.

The positions of the armies prior to the afternoon attack
As the French attacks paused after the repulse of the morning assault it soon became obvious to the British commanders atop the Cero de Medellin of French preparations for their next and final attack with divisions moving off the opposite Cerro de Cascajal to the north and south threatening the left and centre of the allied positions.


With this adjustment of enemy forces needing to be countered, Wellesley requested troops from Cuesta to be deployed in the northern valley and in response General Albuquerque's cavalry division and Bassecourt's infantry division moved into the valley to support the British cavalry divisions of Generals Anson and Fane.

Major General Luis Alejandro Bassecourt
5th Division: Major-General Bassecourt - Source Oman (Battalions)
Real Marina (Royal Marines), lst Infantry Regiment (2)
3/Africa Infantry Regiment
Murcia Infantry Regiment (2)
l/Reyna Infantry Regiment
Provincial de Siguenza (Militia)

The Infanteria de Marina (Marine Infantry) had an establishment of 12,000 men divided into six regiments of two battalions each having six companies.


The Marine Infantry wore the same uniform as the line infantry differing only in the colour, blue instead of white.

Officers wore the uniform of the Spanish Royal Navy and when serving as land forces would occasionally wear a gilt gorget not worn when serving aboard ship.

Free Painting Guide - Captain Games see link below


The Royal Decree of 1802 set the flags (Colours) carried to one per battalion with the Coronela (Kings Colour in British parlance) carried by the first battalion and the Sencilla (Regimental Colour in British), adorned with the red Cross of Burgundy and surmounted at each corner with anchors, carried by the second battalion.

Contemporary illustration of a Spanish Marine Officer
Unlike the line infantry, I can find no reference to the grenadier companies being detached into separate battalions and so have modelled my marines with their grenadier company resplendent in their Spanish style bearskins adorned with the red-flap at the back with gold tassel, lining and anchor.


I must also extend my thanks to Tony aka MSFoy who hosts the blog Prometheus in Aspic who in building up his own collection of Spanish Napoleonic troops has developed a very nice range of regimental Spanish colours to adorn his own units and which he unselfishly offers to others.

http://prometheusinaspic.blogspot.co.uk


I adapted Tony's methods to rough up my own version of the Colours and he very kindly applied the texturing.


In the best traditions of Prometheus in Aspic I attach the first of these, the Coronella, for other enthusiasts to copy from here and size according to your preferred scale.


My 1/1 Real Marina are composed of figures from AB supplied by Fighting 15's.


Sources referred to in this post:
The Armies of Spain and Portugal 1808-14 - G.F.Nafziger & M Gilbert
Spanish Army of the Napoleonic Wars (1) 1793-1808 - Rene Chartrand & Bill Younghusband

Sunday 5 February 2017

Lieutenant Colonel George Henry Duckworth and the 1/48th Foot at Albuera

A young officer from the 48th Foot from the time of the Peninsular War
Yesterday was spent enjoying the delights of Topsham as Carolyn and I enjoyed the company of family during lunch in the town.

As you know, I always like to take the opportunity to enjoy the local history and being in Topsham presented the chance to call into St Margaret's Church on our way to the station to catch a train back to Exmouth.

St Margaret's is a Grade II listed building with original parts of the church, namely the tower dating back to the mid 15th century, and has had several re-builds over the centuries following damaging fires.

I came to know the church a few years ago when I attended a family Christening and was immediately drawn to the many historical monuments to various people dotted around its interior, one of which drew my attention, so as to cause me to make a mental note to return at some time to do some more research.

St Margaret's Church Topsham overlooking the River Exe
 This being a bit of a 'spur of the moment' visit, I only had my camera phone to hand, but grabbed a picture of the monument I was particularly interested in, namely the one below commemorating the death of Lieutenant Colonel George Henry Duckworth on the 16th May 1811 at the Battle of Albuera.


My camera phone was not up to the poor lighting in the church - see below for the citation on the plaque
"Sacred to the memory of George Henry Duckworth late Lieutenant Colonel of the 48th Regiment of Foot who fell at the Battle of Albuera on the 16th of May 1811 at the head of the first battalion while encouraging his men to charge the enemy. He had not completed the 19th year of his age. On the field where he sorly fell his remains lie buried."

Colonel Duckworth was the son of Admiral John Thomas Duckworth who at the time of his son's death was serving as Governor of Newfoundland, tasked with building better relations with native American tribes and improving the colony's defences.

It was Admiral Duckworth who on moving to Topsham established the family vault at St Margaret's and on his death in 1817 was buried there with full military honours. I attempted to get a picture of his tomb but my poor old camera phone wasn't up to it so that remains for a later post.

Admiral Sir John Duckworth
The 1/48th landed at Lisbon in early June 1809 and would play a pivotal role in the battle of Talavera being close at hand in the afternoon battle; when the KGL infantry to their front carried their counter-attack too far into French lines and on being repulsed by fresh French troops exposed the British line to an immediate French counter-attack.

General Wellesley ordered Lieutenant Colonel Charles Donellan to lead the 800 strong 1/48th into the gap caused by the KGL move and, with open ranks to allow the German troops to pass through to reform in their rear, opened up a devastating fire on the pursuing French columns, bringing the French attack to a halt.

When the smoke cleared and the French infantry were seen to be falling back in disorder with General Lapisse their Divisional commander dead and Colonel Donellan mortally wounded with a shattered knee cap, the battle was effectively over, earning the 48th Foot their nick name "The Heroes of Talavera".

A corporal of a fusilier company
 in the 48th Foot - Bryan Fosten
It was in the post Talavera command appointments that Lt. Colonel Duckworth took command of the veteran 1/48th Foot and it was he who lead them two years later as the 2nd Division under Major General William Stewart alongside  Major General Sir Galbraith Lowery Cole's  4th Division formed the core of British infantry in Marshal Sir William Carr Beresford's Anglo-Portuguese army.

Beresford had taken command of the allied force following the re-occurrence of a bout of Walcheren malaise that forced General Hill to take home leave to recover.

Thus it was Beresford who had independent command to take back the city of Badajoz which had fallen to Marshal Soult the previous year, whilst Sir Arthur Wellesley, now created the Duke of Wellington,  took the bulk of Allied troops north in pursuit of Marshal Massena's beaten army as he fell back to Cuidad Rodrigo in desperate need of reinforcements and supplies.

Meanwhile Marshal Soult aware of Beresford's approach began to call in his garrisons and troops laying siege to Cadiz ready to march north to relieve Badajoz and to challenge the Anglo-Portuguese force.

My 1/48th prepared for the Talavera project
Marshal Soult's move was a predictable response and Wellington ordered Beresford to leave a covering force at Badjoz and to move the bulk of his army to rendezvous with Spanish troops at a pre-selected site on the River Albuera at the town of that name a few miles south east of the city.

To say that Beresford was unsuitable for independent command is an understatement and his inability to command his forces in a coherent manner was demonstrated more than once during the Albuera campaign, only accentuated in times of great stress.

The Battle of Albuera would expose Beresford's incompetencies to such an extent that it would be the Spanish troops under General Zayas his junior British commanders and the steadfast British infantry, that would win the battle in spite of him and leave an exasperated Marshal Soult to state
"There is no beating these troops, in spite of their generals. I always thought they were bad
soldiers, now I am sure of it. I had turned their right, pierced their centre and everywhere victory
was mine – but they did not know how to run!"

The victory was indeed Pyrrhic with about 8,000 troops lost to both sides and with over 4,000 British casualties, only leaving victory to be declared because it was the French who withdrew south. An exasperated Wellington realising the political damage such casualties could cause at home and meeting a depressed Beresford, dismissed the Marshal's initial report of the battle stating sharply, "this won't do, write me up a victory!"

Map illustrating the initial stage of the Battle of Albuera with Hoghton's brigade yet to move through the Spanish lines
One of the best accounts I have read about the battle and campaign of Albuera is "Albuera 1811, The Bloodiest Battle of the Peninsular War" by Guy Dempsey which is one of those forensic studies that attempts to give as clear a description of the events as known intermixed with commentary from first hand sources that report the events described together with expert analysis.

Thus it was to Dempsey that I turned to discover what was known about Colonel Duckworth's role in the battle, his death and any information surrounding it.

As the French columns press the allied flank, and are stymied by the steady Spanish troops,
the British brigades marked A, B & C move forward to take up the fight.
The Battle of Albuera is unusual in that it is one of those occasions when British infantry did not conform to their usual tactical methods, namely the fire, cheer and charge that had served them so well on other occasions when tackling French infantry.

The tactics described were developed over time to avoid the very situation that developed in this battle with both sides conducting a lengthy close range fire-fight unable to break the deadlock and culminating in terrible casualties for both.

The other unusual aspect of this battle and one that surprised the veteran French infantry was that the Spanish troops under General Zayas held their ground as the French columns approached their lines and their volley fire forced the French columns to halt and attempt to deploy into line.

It was following this Spanish defence that British infantry pushed their way through their allies line to deliver their own volley fire on a French force disordered by the robust Spanish fire.

The map below is based on a similar one from Dempsey's book and he describes the action of the 1/48th,

 "The last unit in the brigade (Hoghton's) was the 1st Battalion of the 48th Regiment. It was unusual to have two battalions from the same regiment serving in the same action, but had previously happened to the 48th at Talavera. Now it was happening again, and the 2nd Battalion had already been annihilated in the French cavalry charge against Colborne's brigade. If the men of the 1st battalion knew of the fate of their regimental comrades, it did not affect their professional calm as they advanced to replace the Spaniards in front of them. The passage of lines does not, however, seem to have been smoothly executed here as it was elsewhere because the Spaniards in front of the 48th 'were in some confusion' and 'The intervals through which the Regt. had to pass were scarcely sufficient for a company'. The battalion nevertheless completed the manoeuvre, re-formed its line and opened fire on the enemy.

One characteristic of the the musketry duel on the northern knoll was the heavy loss suffered by the officers of each battalion. They were normally stationed, for obvious reasons, on the flanks and in the rear of the firing line, but this does not seem to have kept anyone from harm. The commander of the 1st/48th was one of the first to fall in the hail of musket and cannon balls, but he was followed by many others."


Dempsey then quotes a letter from 'an officer high in rank in General Beresford's army' that appeared in the Gentleman's Magazine, June 1811.

"Lieut. Col. Duckworth was first severely wounded in the left breast by a musket ball, while gallantly leading his regiment to the charge; but ... he could not be induced to quit the field. Shortly after another shot struck him in the throat and he expired without a groan." 

Surgeon Guthrie examined Duckworth's body post-battle and found the cause of death to be "a ball ... which divided the carotid artery, and killed him almost instantly." 

Dempsey's book presents a lot of information about the fall out from Albuera in terms of its effects on the survivors and families and in one of these latter chapters I discovered the sad tale of Duckworth's wife together with some discrepancy over the late Colonel's age at the time of his death.

In an age before military pensions and help for dependants of fallen soldiers the story of Penelope Duckworth is very illustrative of the times.

"The most melancholy incident .... concerning Albuera relates to Lieutenant Colonel Duckworth of the 48th. He was only twenty-three at the time of his death, (note his memorial in Topsham states his age to be just 19 which I thought was extremely young for a Lt. Colonel even allowing for commission purchase) but he had married at an early age and already had a four year old child. The grief of his even younger widow, Penelope (aged twenty-two), must have been all the greater because 'On the day of the afflicting news of the Colonel's death arrived at Plymouth, their only son ..... lay dead in the house, and was buried the following day. To make matters worse, the simultaneous deaths of her husband and son had a catastrophic effect on the economic well-being of Duckworth's widow: 'The admiral (Admiral Duckworth mentioned above) is at sea, and his infant son by his second wife, Miss Butler, will now be heir to the title and estate. Mrs Duckworth never remarried prior to her death almost forty-four years to the day after that of her husband."

Thus through no fault of her own, but purely through a tragic sequence of events compounded by the time she lived in, poor Penelope Duckworth not only suffered the tragic loss of her husband and young son but also the loss of rank and station together with the financial consequences that entailed.

Sources referenced for this post:
St. Margaret's Church Topsham, Devon
Sir John Duckworth, 1st Baronet
Wellington's Regiments - 48th Foot
JJ's Wargames - 1/48th Foot Northamptonshire Regiment
https://en.wikipedia.org/wiki/Battle_of_Albuera
https://en.wikipedia.org/wiki/Battle_of_Albuera_order_of_battle
Albuera 1811, The Bloodiest Battle of the Peninsular War - Guy Dempsey

Next up, Spanish Marines for Talavera